# Plate Editor
# Steps to draw plate
# Mark plate center
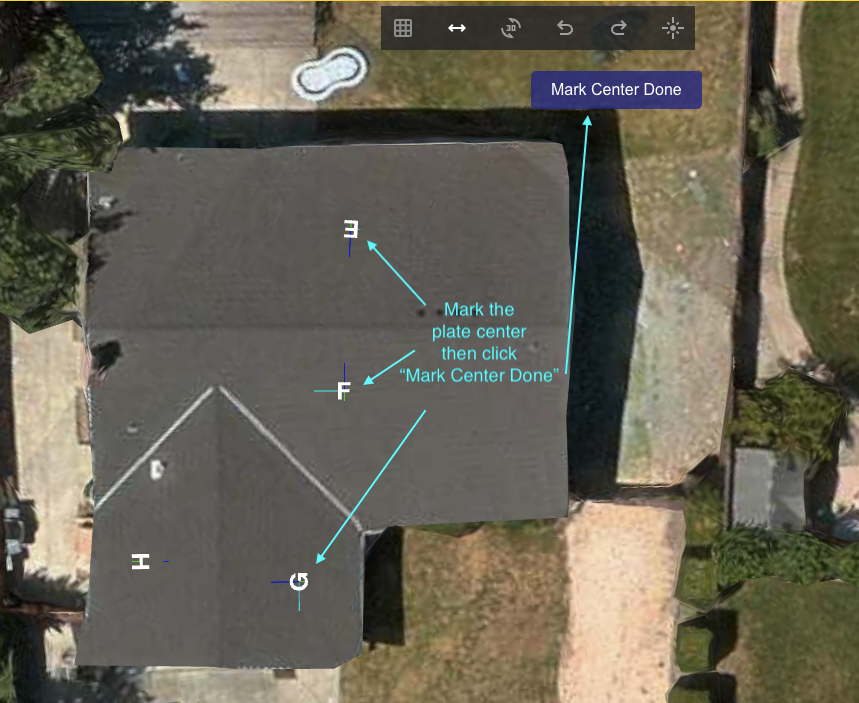
This step creates plate vectors:
- Normal
- Direction
- Horizontal
and plate letters that are used for plate drawing.
The plate menu will use this data to populate the right menu.
# Select Plate
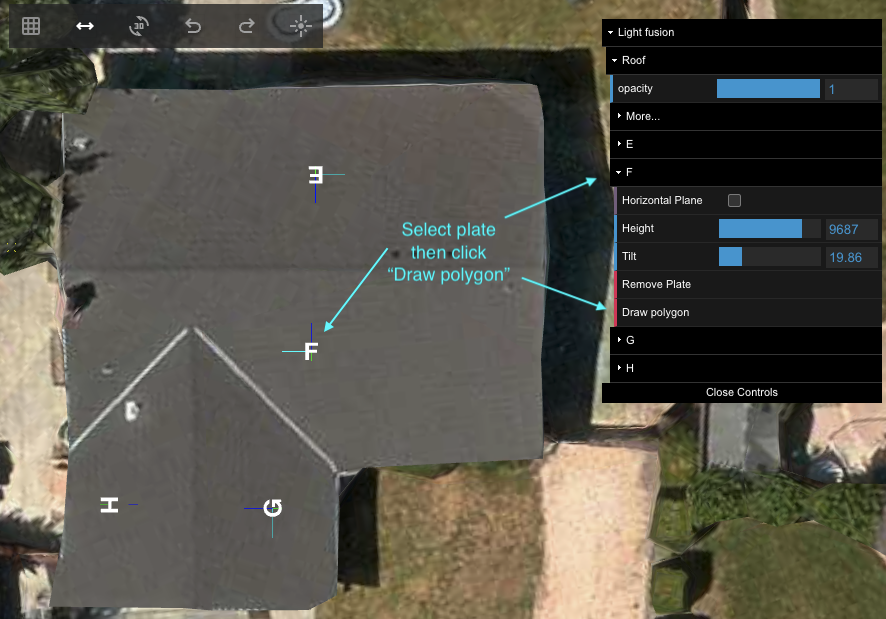
To select a plate, the user can double-click on the plate or expand the right menu by clicking on the plate letter in the right menu.
Other plates will be dimmed.
# Draw Plate

Draw a plate by clicking on the edge point of the plate. If the last point is not in the correct position, the user can use the "Undo" button from the top menu. To finish drawing the plate, press the Enter button.
# 3D Preview
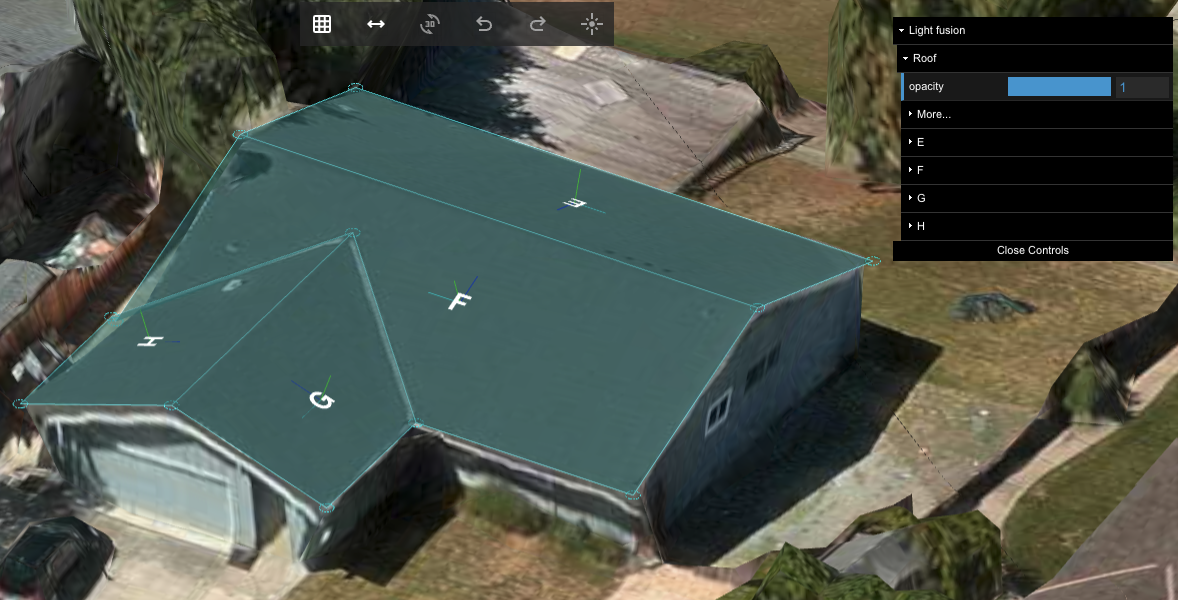
- Use the "3D" button from the top menu to switch between the Orthographic Camera (2D) and the Perspective Camera (3D) and back.
- To rotate the building in the 3D preview, drag with the left mouse button.
- To move (pan) the building in the 3D preview, drag with the right mouse button.
# Edit Plate
The existing plate can be modified by:
- Adding a new point by double-clicking on the plate edge.
- Moving an existing point by dragging the plate point.
- Moving the plate by dragging the plate center while holding the keyboard Shift key.

- Deleting a point when the mouse cursor is over the point, using the delete keyboard button.
- Deleting a plate polygon when the mouse cursor is over the center of the plate, using the delete keyboard button.
- Deleting a plate polygon and plate vectors using the 'Delete Plate' button from the right menu.

- Changing the plate height using the slider from the right menu.
- Changing the plate tilt using the slider from the right menu.
